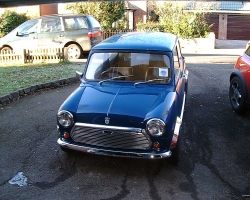
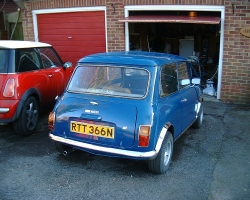
| How we got started | This project started with my daughter, Katie, approaching driving age and wanting a mini! Several months of scouring mini mags turned up a MKIII nearby in generally good condition. Meg, a Teal Blue 998 came with current MOT and was driven home without drama. The objective was to get the car ready for my daughter's 17th birthday just after Christmas, keep the spend low (Katie paid for the car, we split 40/60 the resto cost). During the next year a full respray is planned, and a gearbox rebuild. |
| Initial Investigation | As with all resto projects, the more you dig, you more you find. Originally, after checking the car before purchase, there was some obvious rust in the normal places, new outer sills had been fitted, and one A panel changed. Once I got to work with the angle grider, much more started to appear. |
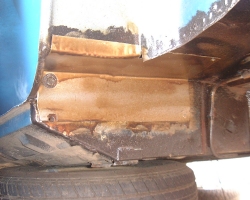
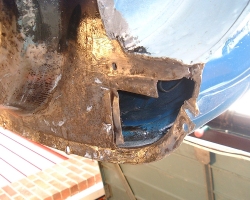
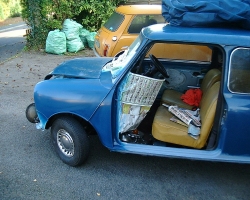
| More problems | Going all around the car, inside and out, the major problems that appeared where in the rear bins, just above the subframe mounts. A screwdriver and pressure washer removed both front top ends of the rear subframe, and the floor panels immediately above.
Removing the subframe revealed even more, with the rear corners of the boot floor also being badly rusted. |
Photos
Home-made repair panel ready to weld |
Boot floor ventilation, cut back to good metal |
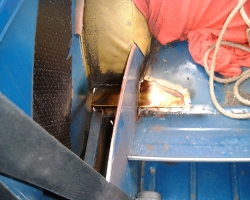
Indside the rear bins after welding, ready for sealing |
| Replaced panels | Ultimately, both sides, back and front of the rear subframe mounting areas were cut away and repair panels made and welded in place. Also, I replaced the N/S/F wing and A panel and both inner sills. |
| Other bodywork | The O/S door was replaced with a good one from the local breakers yard, but the N/S was badly rusted only underneath. Cutting back all the metal, I made an L shaped panel and riveted it into place. I also fitted a new rear valance as it disintegrated when touched! Tip: If you try this at home, buy a spot weld cutter, it makes the removal of the old panels much faster and neater. |
Photos
Standard feature of mini wings |
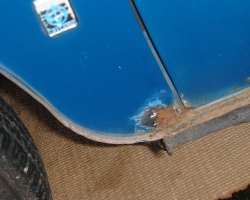
Same situation for the A panel |
Bottom of the repaired door |
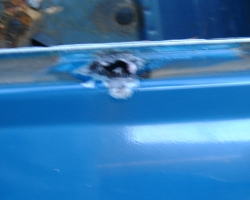
| Other areas | All around the roof guttering, bottom of the rear/side windows, tops of the rear wheel arches, along the door step, these all needed grinding back to bare metal, rusting-treating, filling and repainting. There was also a dent in the boot lid beside the number plate. This was filled and painted, plus other rust patches dealt with. |
Photos
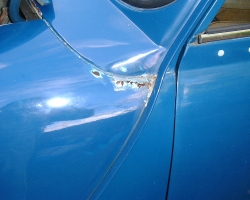
First coats on the new wng / A panel |
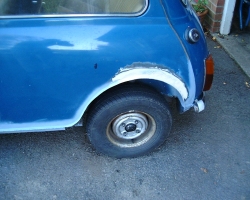
Rear arch preparation |
Additional rear side window ventilation |
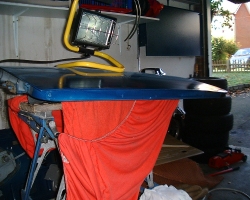
| Painting | With a limited budget, it was decided to repaint with aerasols. The local paintshop mixed 2.5 litres in spray cans, and all areas were given four base coats and five top coats. This was all done outside, so I had to wait for dry days when there was no wind (remember, this was Oct/Nov/Dec in England!! After painting, the underside around the subframe was stripped, primed and undersealed, together with the outer sills, wheels arches, valance, etc. Inside the boot, petrol tank, visible interior areas, etc, were also cleaned and repainted. |
| Mechanics | The engine was fine, having covered only 38K miles since new, but 3rd gear synchro doesn't like my Cooper S changes, a job for the summer. A used but good condition rear subframe was found for £20, stripped, rust treated and repainted. All orignal mechanicals refitted. Cooper S rear drums added, and spacers on the front. I also stripped most of the ancillaries from the engine and rust treated the engine bay. An oil change and engine tune resulted in instant starts whatever the weather. A set of mini Special 5J x 10 alloys, part worn Yokos, chrome arches, new bumbers, and a lot of spit & polish, plus three months and £400. Oh, and don't forget that chrome exhaust trim... |
The final result - Photos
|
| | | |
 club
club